Nextech Documentation
Thank you for purchasing Nextech WordPress Theme. We hope you enjoy building your project with us. Before you get started, please be sure to always check out these documentation files. You will find your answers from this documentation and it provide you with clearer details that you need to know to use Nextech Theme. If you are unable to find your answer or find any bugs in the documentation please contact us for support don't hesitate to mail us at webextheme@gmail.com
- Item Name : Nextech - Creative Digital Agency WordPress Theme
- Created: 15 February 2024
- Item Version : 2.0
- Support : webextheme@gmail.com
- Author : WebexTheme

Getting Started
To install this theme you must have a working version of WordPress already installed.
- For information in regard to installing the WordPress Platform, please see the WordPress Codex: Installing WordPress
- Before to start working with your new theme, make sure that your WordPress Version is updated to the latest one.
- You can know more about WordPress Requirements from here.
Server Requirements
Please make sure you have fullfilled the following Requirements
-
WordPress 6.4 or higher version -
PHP Version 7.4.0 or Upper -
MySQL 5.6 or greater
It is also recommended to setup your php limit to avoid the common issues during the plugin installation and demo import.
-
memory_limit 128M -
max_execution_time 180 -
post_max_size 64M -
upload_max_filesize 64M -
max_input_time = 120 -
max_input_vars = 10000
Knowledge Base
Firstly you need to install WordPress on your server using softaculas or other installer. It depends on your hosting provider.
Here are some usefull links to get started with WordPress:
- Official instruction of installing WordPress on your server- WordPress Installation
- Here is the official guide to get started with WordPress- Getting Started
What's Included in the zip folder
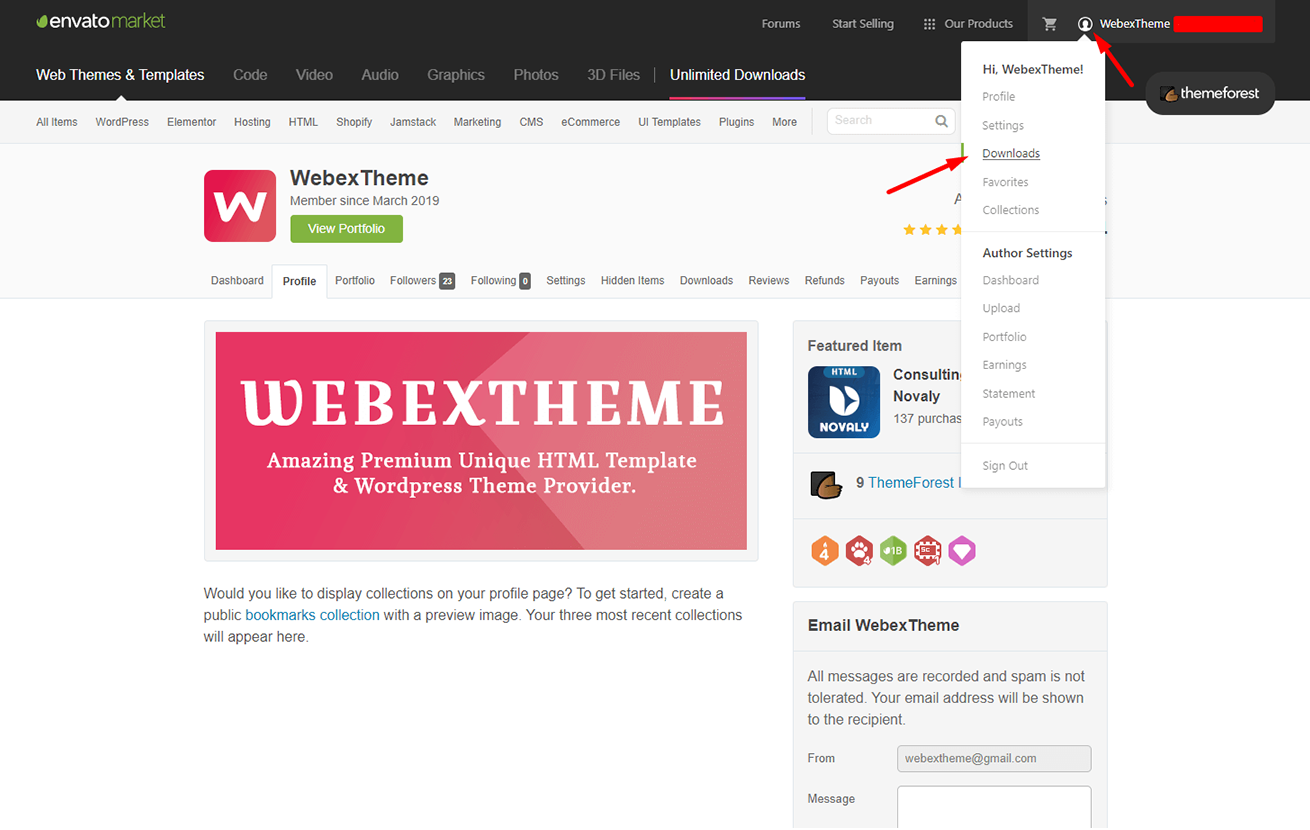
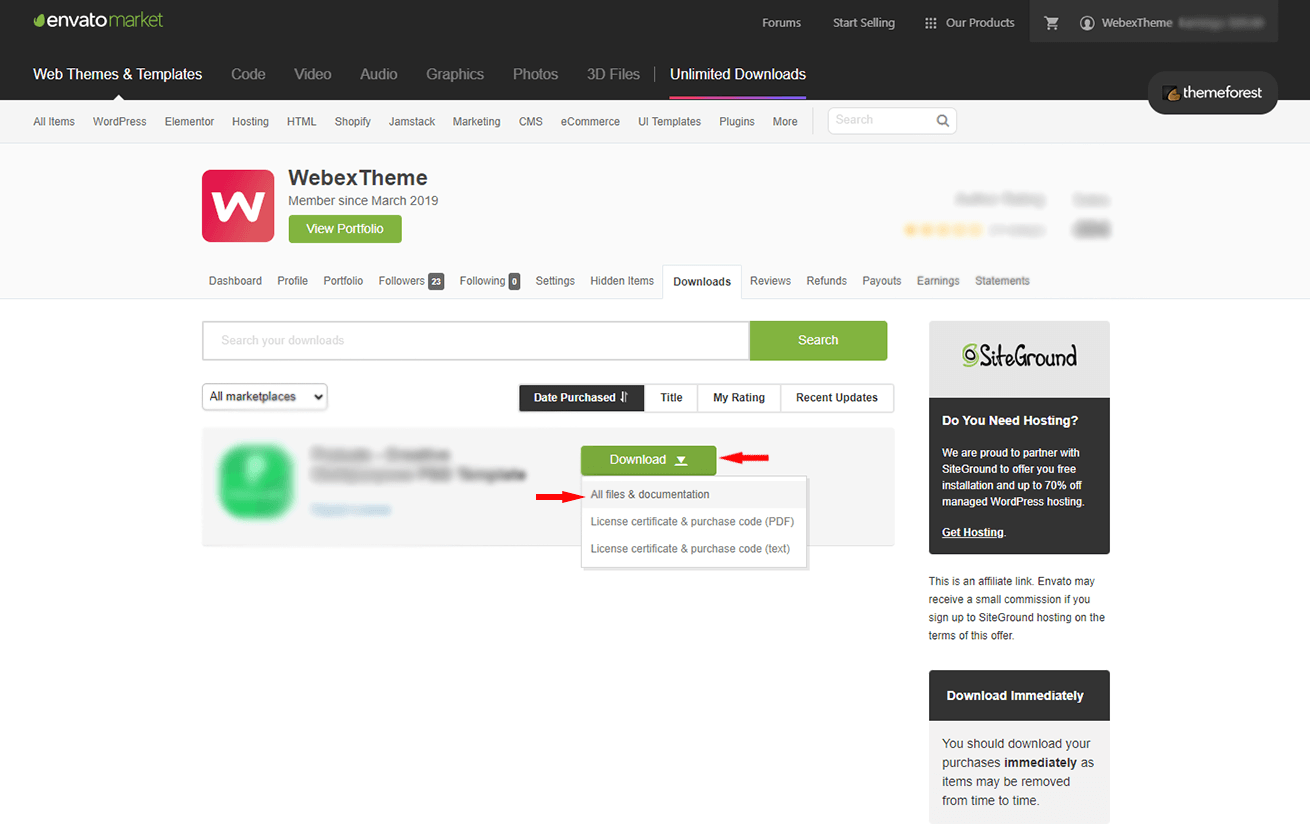
After purchasing Nextech theme on themeforest.net with your Envato account, go to your Download page. You can choose to download Nextech theme only (Installable WordPress Theme) or the entire Nextech theme package which contains the following files:
- Nextech theme: An Installable WordPress Theme zip file.
- Nextech child-theme: A child-theme zip file and a readme.txt note about the child-theme.
- Documentation: A link to this documentation.
- Licensing.
Installation
It’s easy to install Nextech WordPress Theme. Just follow these steps, they won’t take much of your time.
First go to your Envato account from ThemeForest and follow these steps like below screenshots
There are two methods to install the Nextech WordPress Theme. The first one is using the WordPress Theme Installer and the second is installing it using the FTP method.
01. WordPress Theme Installer
- Login into the WordPress Dashboard and search for
Appearance -> Themes - Click
"Add New"at the top of the page. - Now click on
"Upload Theme" - Choose the
nextech.zipfile that is included from Themeforest downloaded bundle packages and clickInstall Nowbutton - Once the installation process is complete you can
Activate the Nextech WordPress Theme
02. FTP Upload Method
- Using your FTP client, login to your server via FTP and navigate to
"wp-content/themes"under your website's root directory. - Here you must place the main folder you will find within the whole package you downloaded from Themeforest, this folder called
"nextech"( unzipped version ). - Once your files are completely uploaded to your server, log into the WordPress Dashboard and go to
Appearance -> Themes - Search the
Nextech WordPress ThemeScreenshot and click to"Activate"
Theme Installation Tutorial
Screenshot Of whole Process to Install Theme
Choose the zip file what you will find within the whole package you downloaded from Themeforest -> "nextech.zip"
.png)
Now, Click Activate to activate the theme
.png)
Plugin Installation
When the theme is uploaded You need to install some recommended plugins.
Click Begin Installing Plugin
.png)
Now, Select all the Plugin to Install
.png)
Now, Select Install then Click Apply Button
.png)
After installing all plugins Click Return to Required Plugins Installer
.png)
Now, Select Activate then Click Apply for Activating all Plugins
.png)
Now, Click Return to Dashboard
.png)
One Click Demo Import
Set Front Page and Posts Page
You can easily import demo data using our one-click demo content importer. View our screenshot to the demo import page.
.png)
Now, Click Continue & Import
.png)
Congrats! Your site is ready..
After import completed successfully, click visit site
.png)
Homepage Settings
To set the default Home and Blog page please login to wp-admin and navigate to Dashboard → Settings → Reading
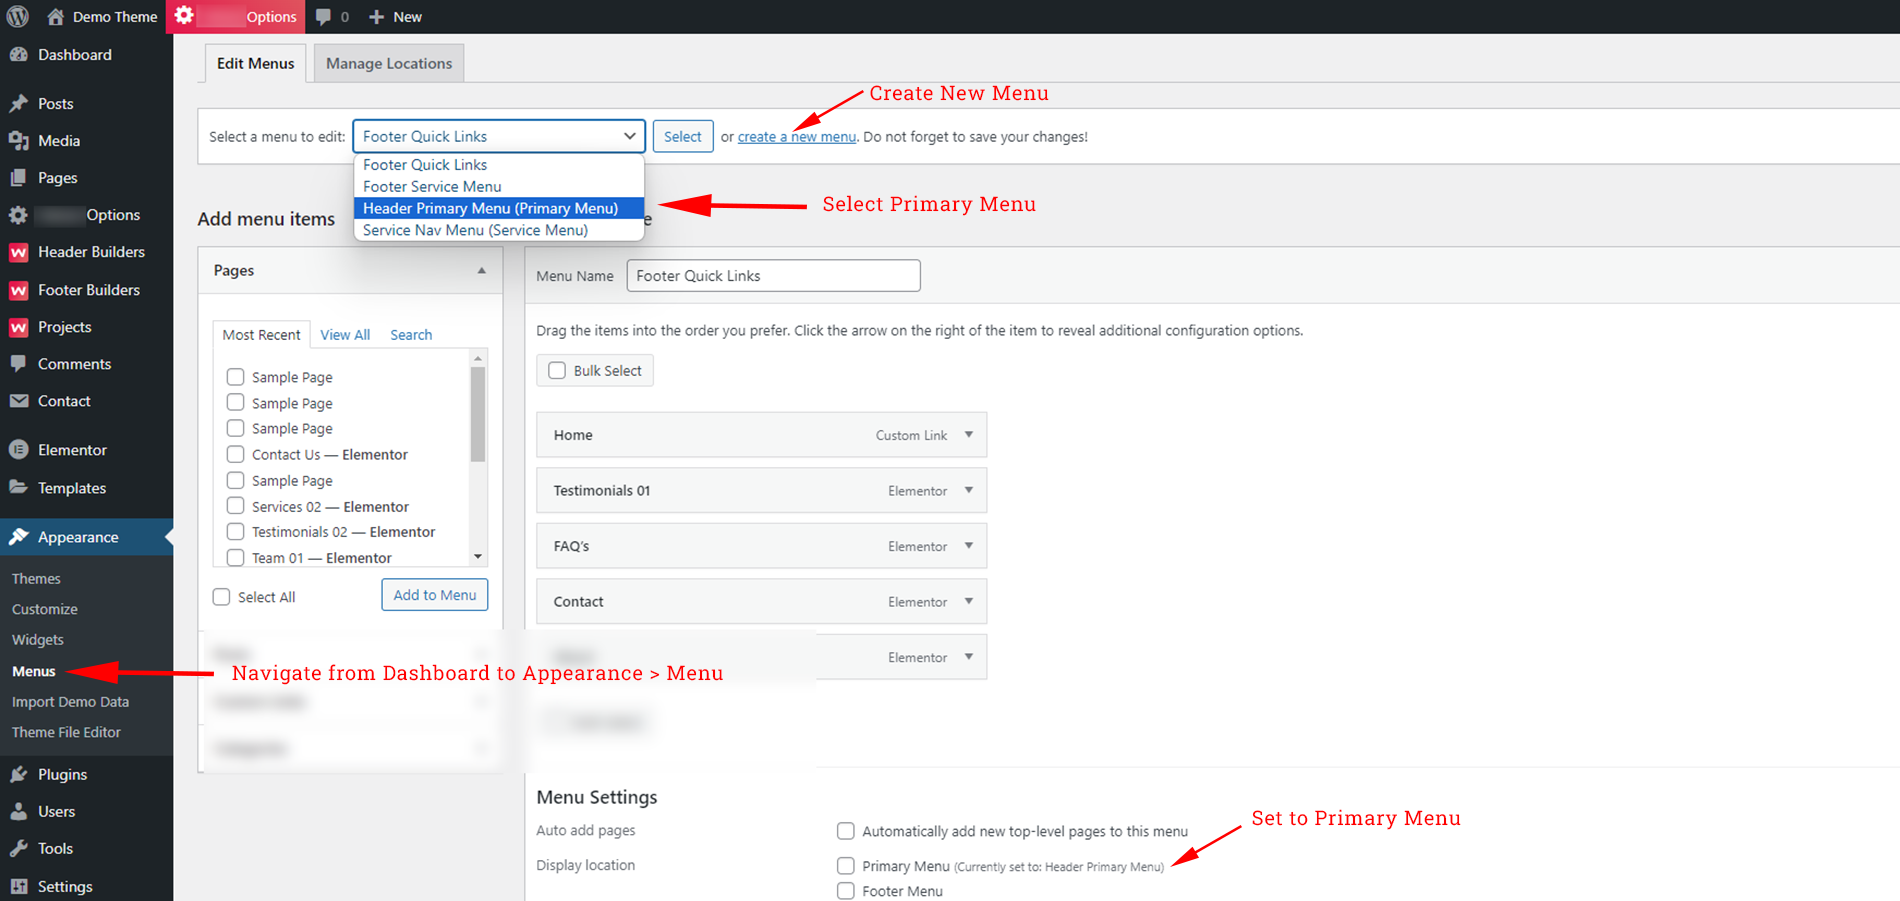
Menu Settings
Setting up Navigation Menus works normally as it does for any WordPress theme. If you’re new to WordPress, you can learn more about menus in the WordPress Codex article.
Go to Appearance → Menus in your admin sidebar and click Create a new menu option..
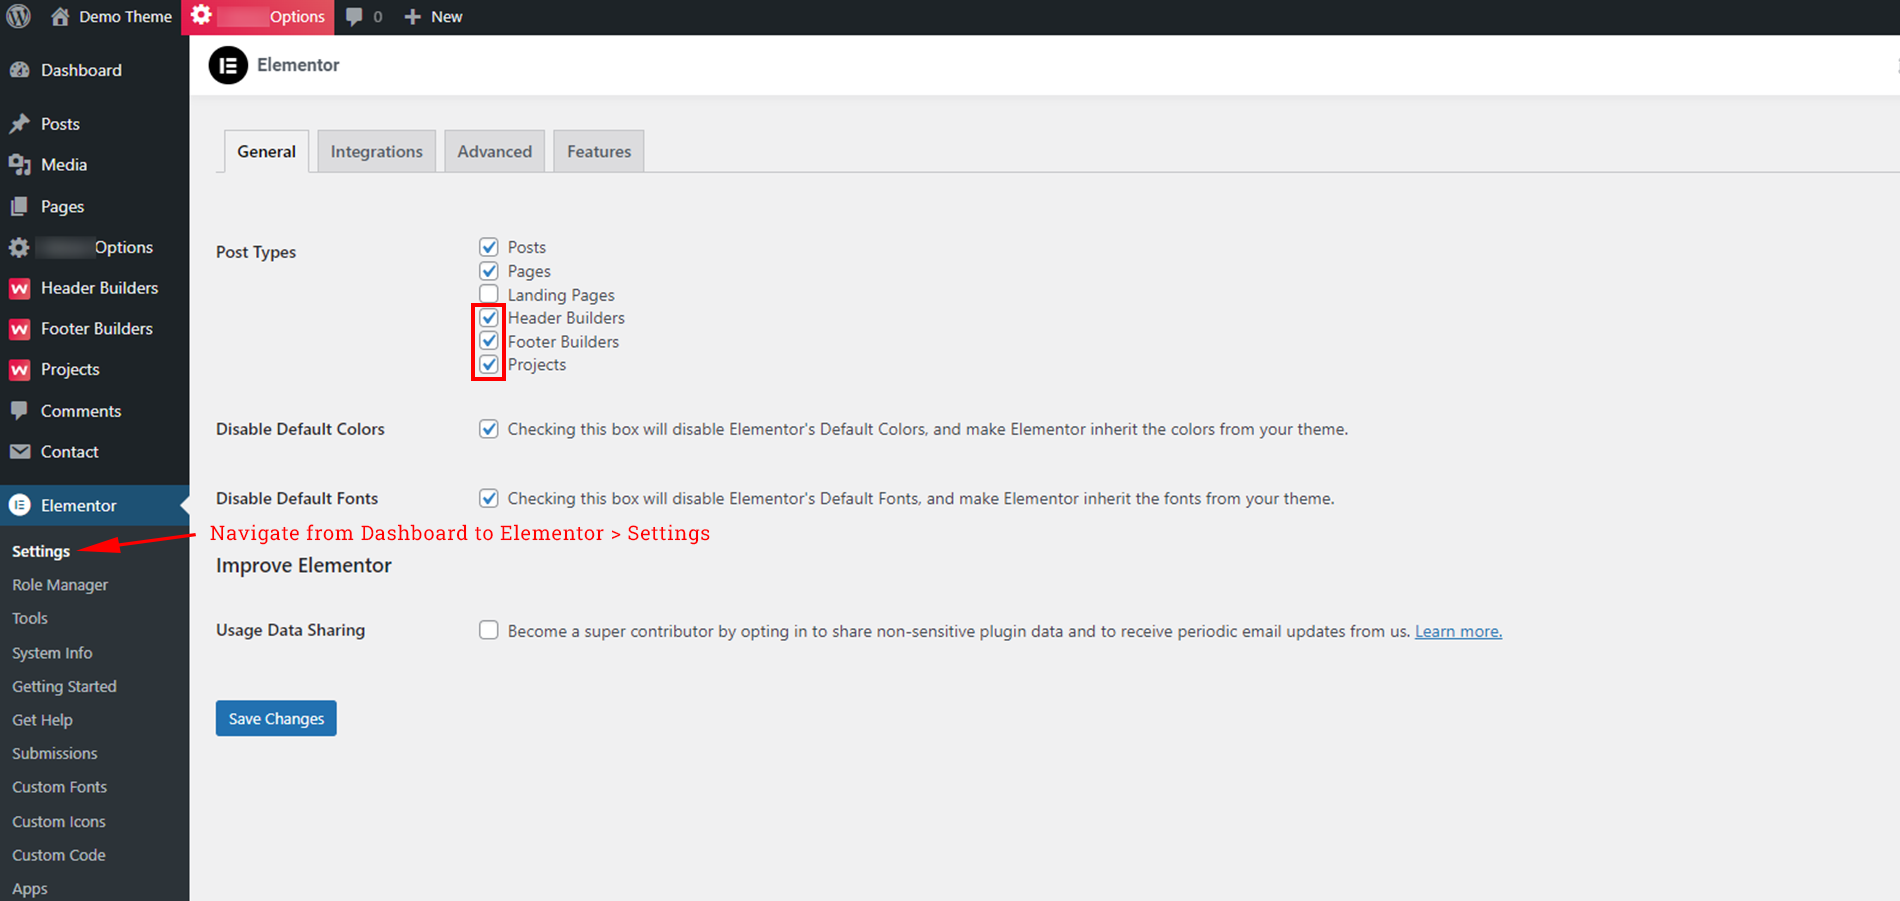
Custom Post Type Elementor Support
To get custom post type elementor support navigate to Dashboard → Elementor → Settings
Changing Logo & Site Title
To change logo and site title navigate to Dashboard → Appearance → Customize
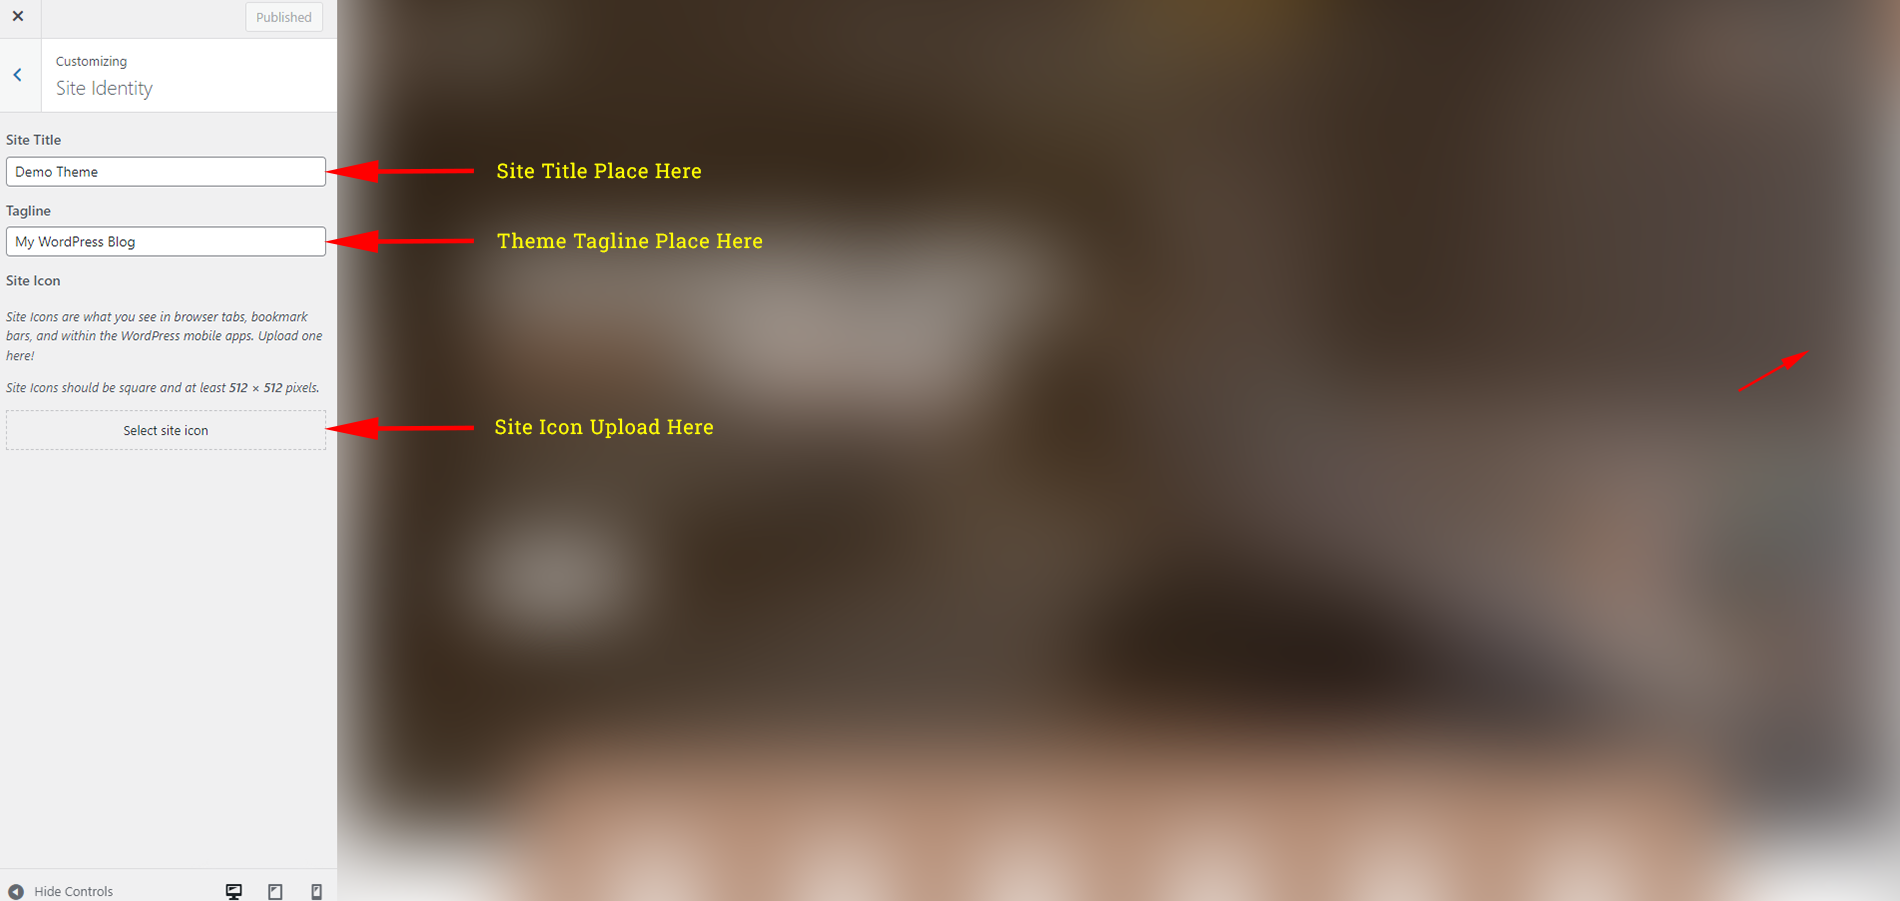
You can also change logo from Theme Options

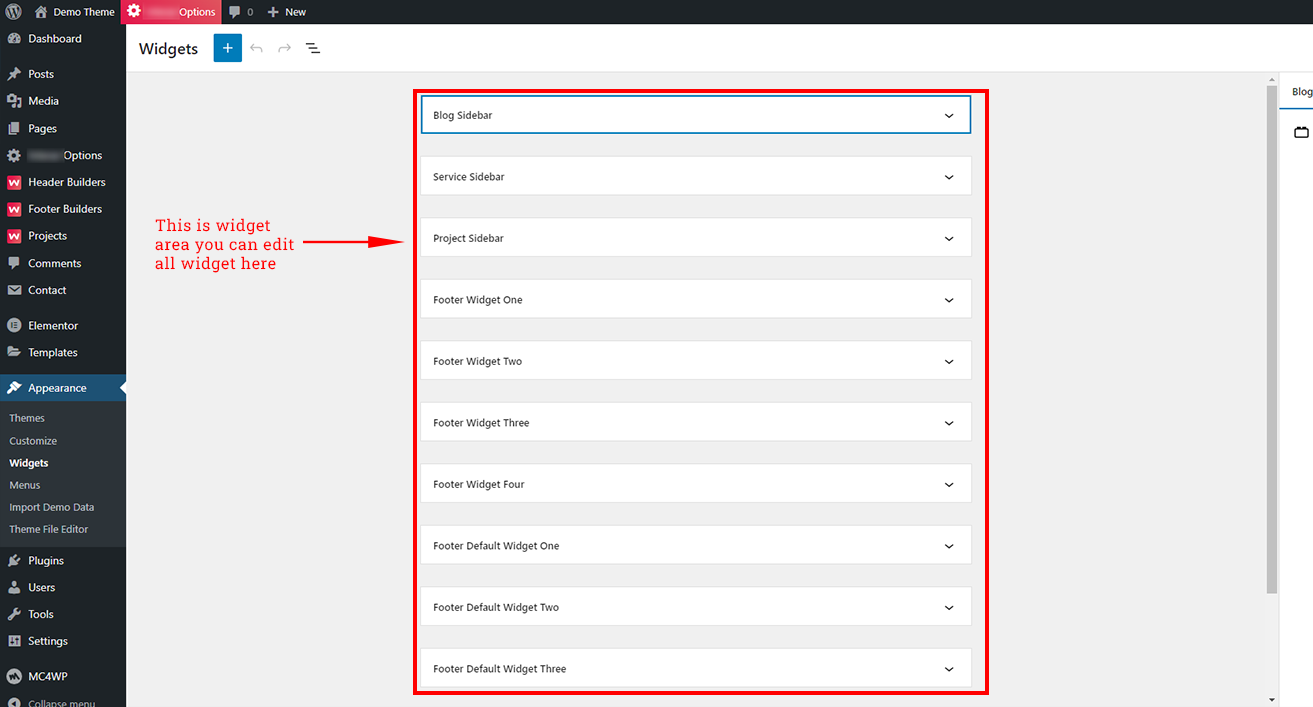
Widget Settings
To setup widget navigate to Appearance → Widgets
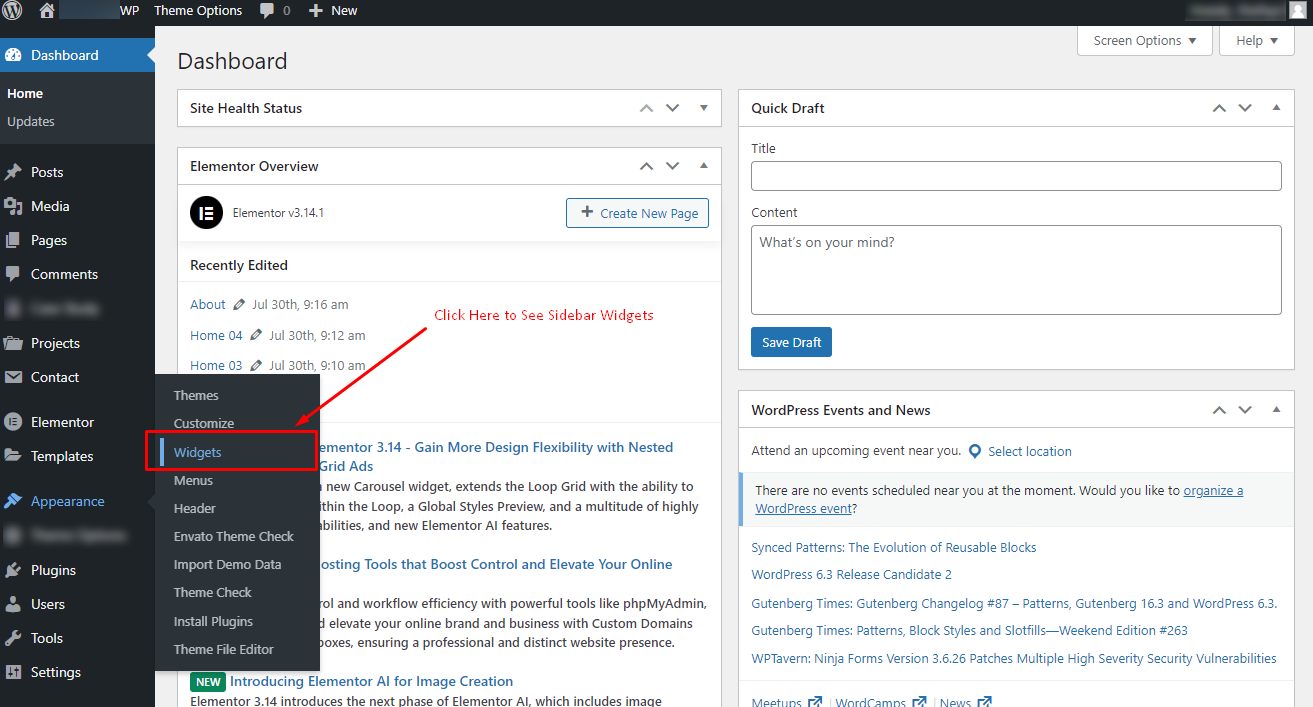
You can see all the widget areas here.
Widget Edit
Click on widget area to edit them.
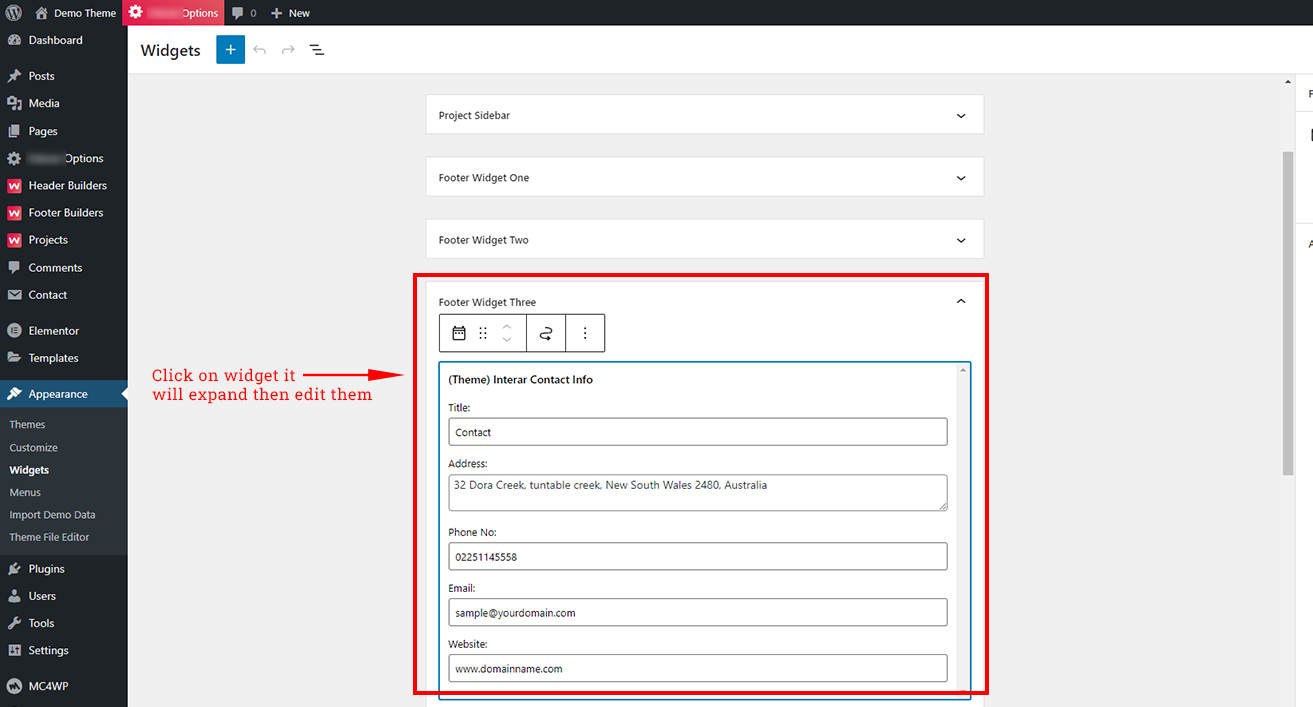
After editing, click Update to save changes.
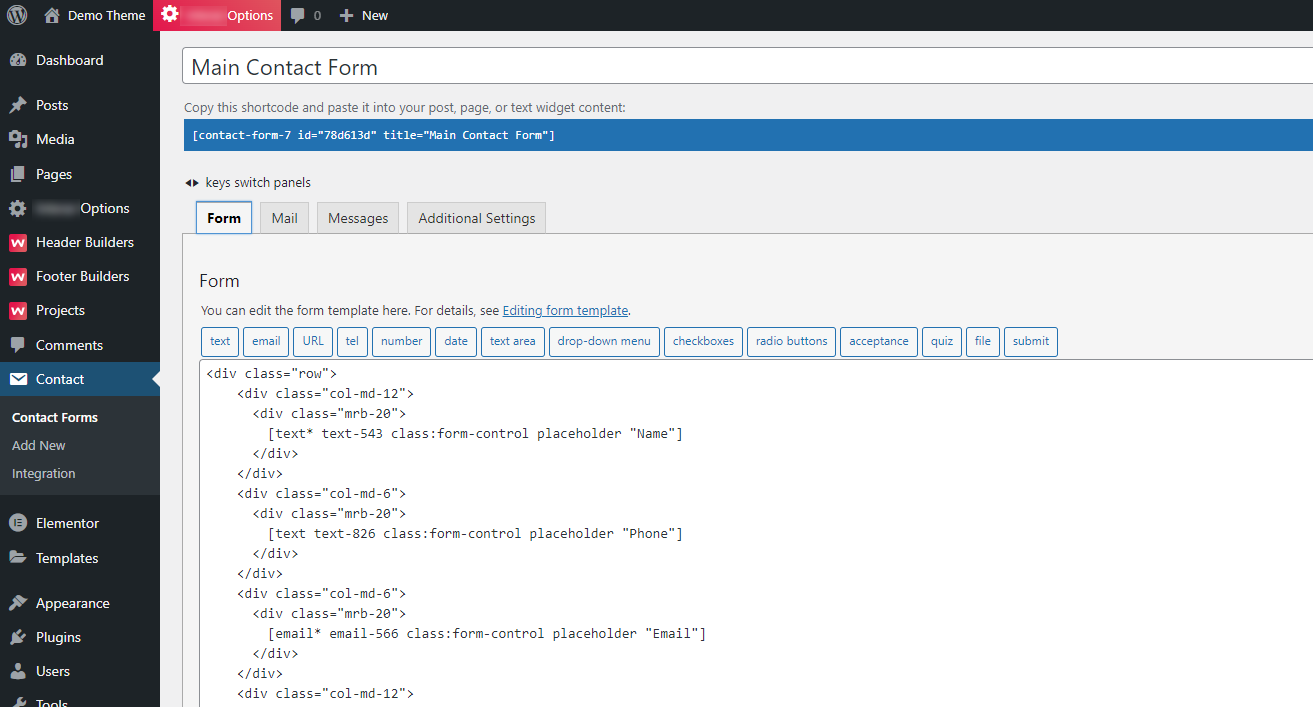
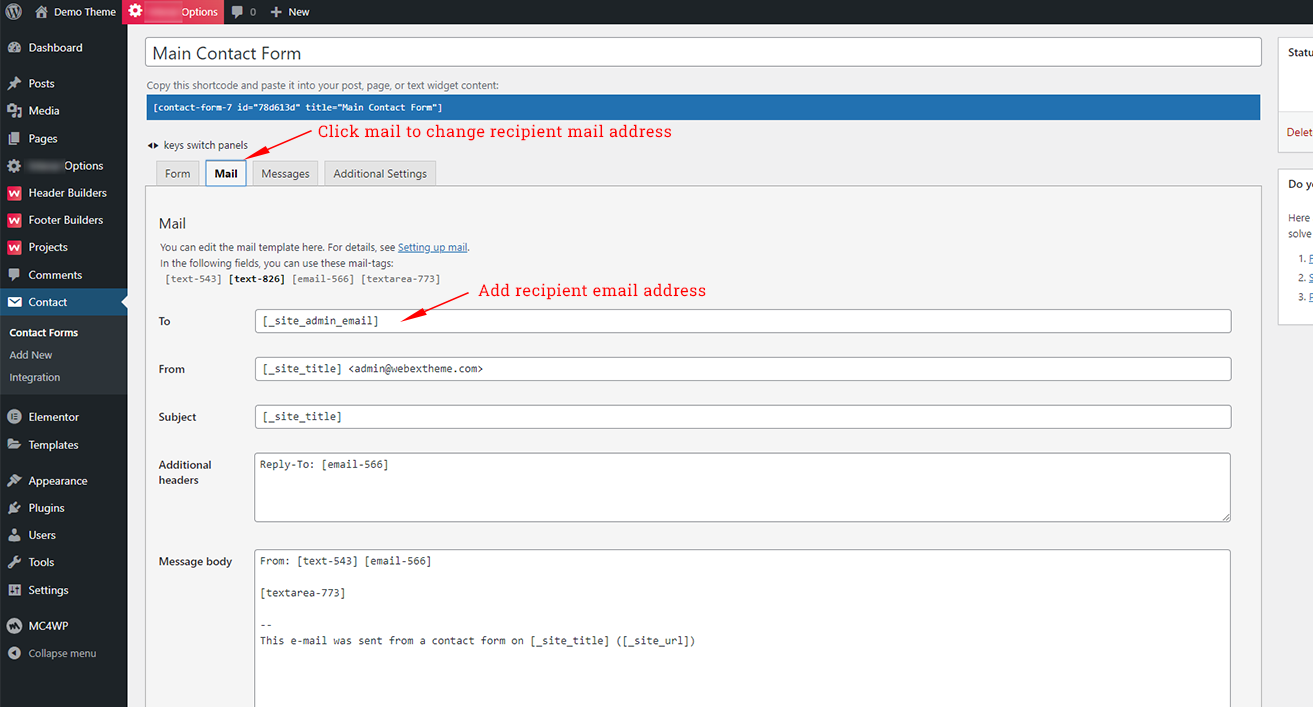
Contact Form 7
Contact form 7 is used to create ‘easy to handle’ and ‘easy to customize’ forms. Nextech theme has a pre-built forms. To get all forms, ‘Contact Form 7’ plugin must be installed and activated. You can add/edit/delete the contact form by following this documentation
https://contactform7.com/getting-started-with-contact-form-7/
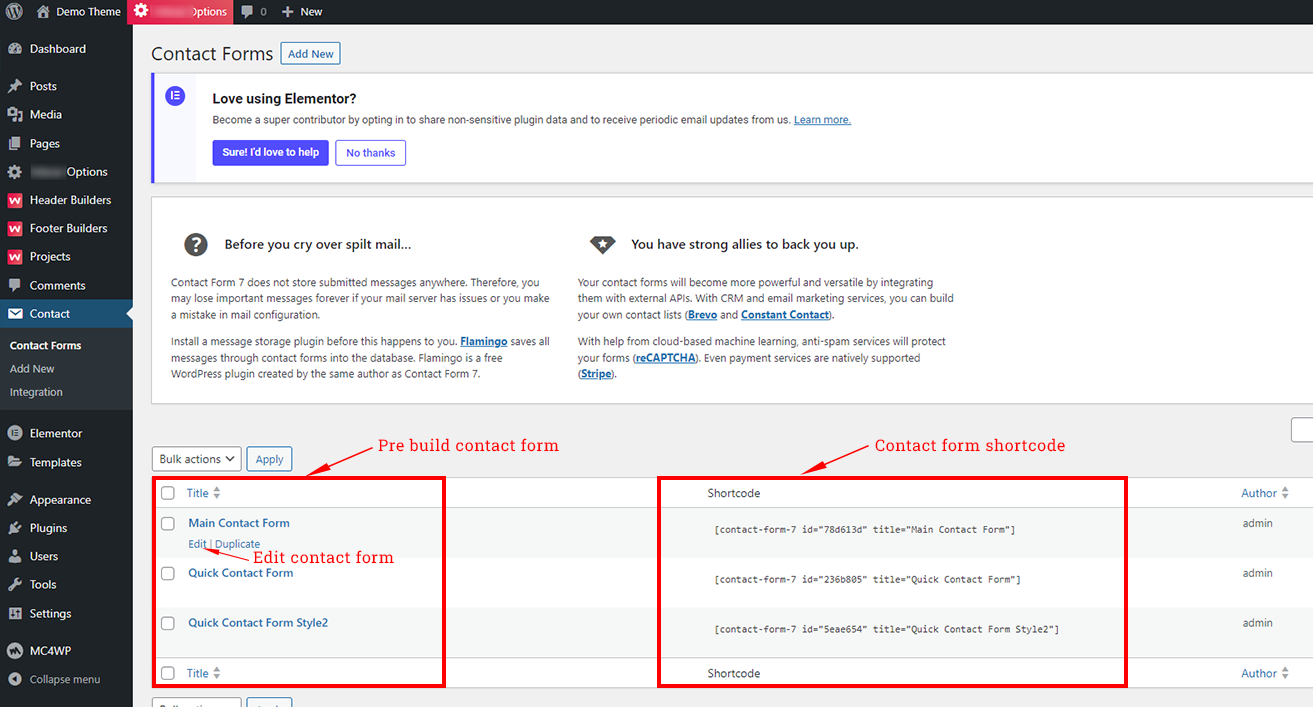
You can copy these shortcode and Paste it everywhere then you will get a contact form. You can also edit contact form for do so you need to click edit like show in screenshot
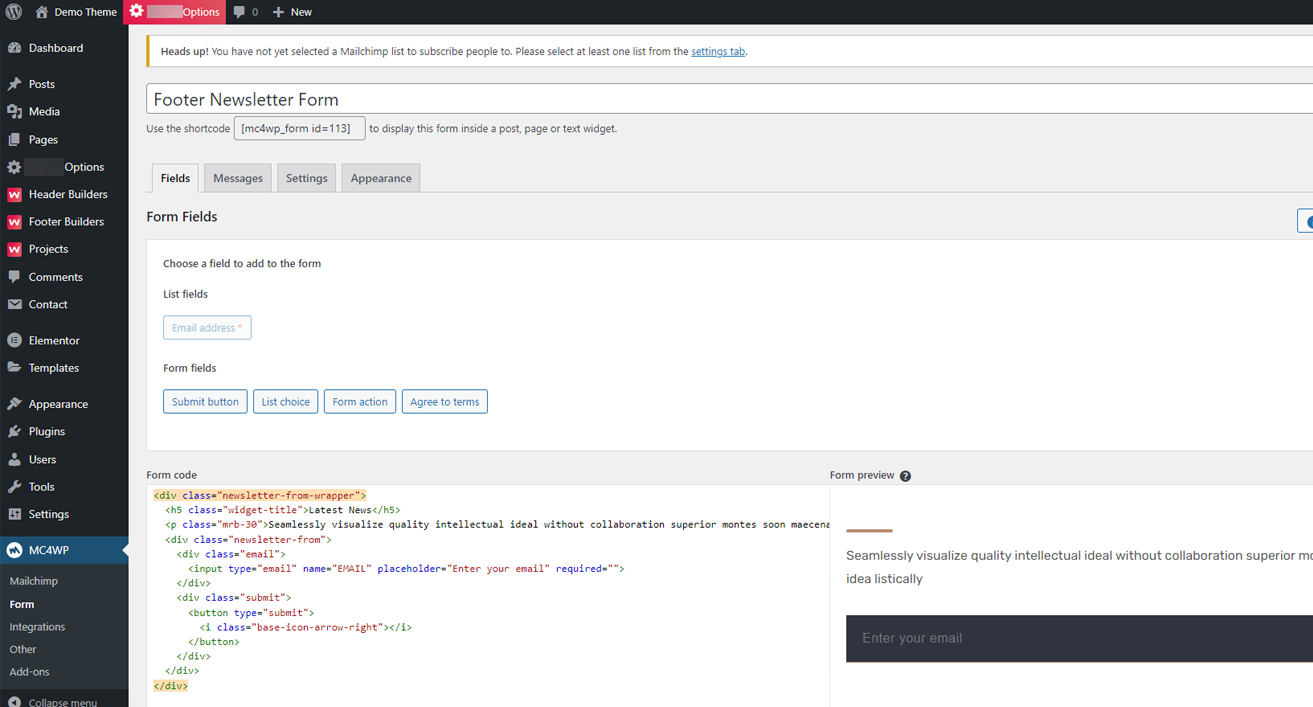
Mailchimp
You can add or edit mailchimp form here
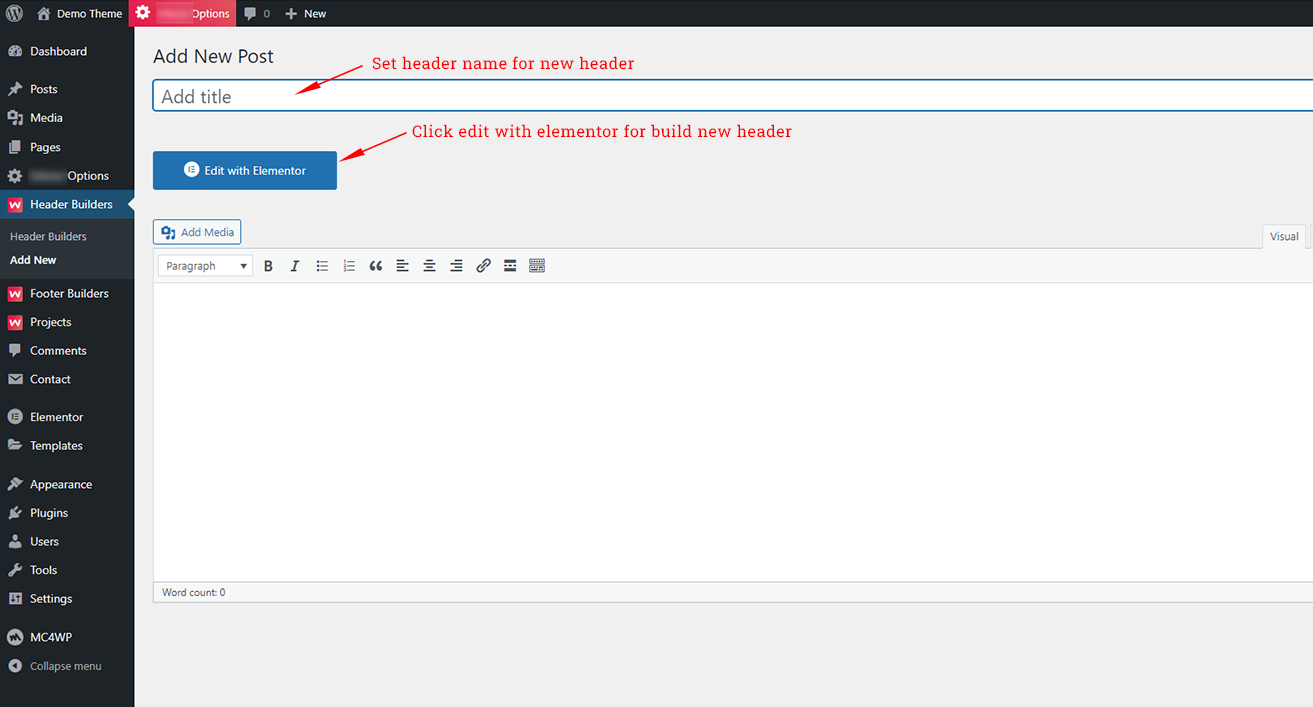
Header Settings
To setup header navigate to Dashboard → Header Builders
You can add new header using elementor page builder from here
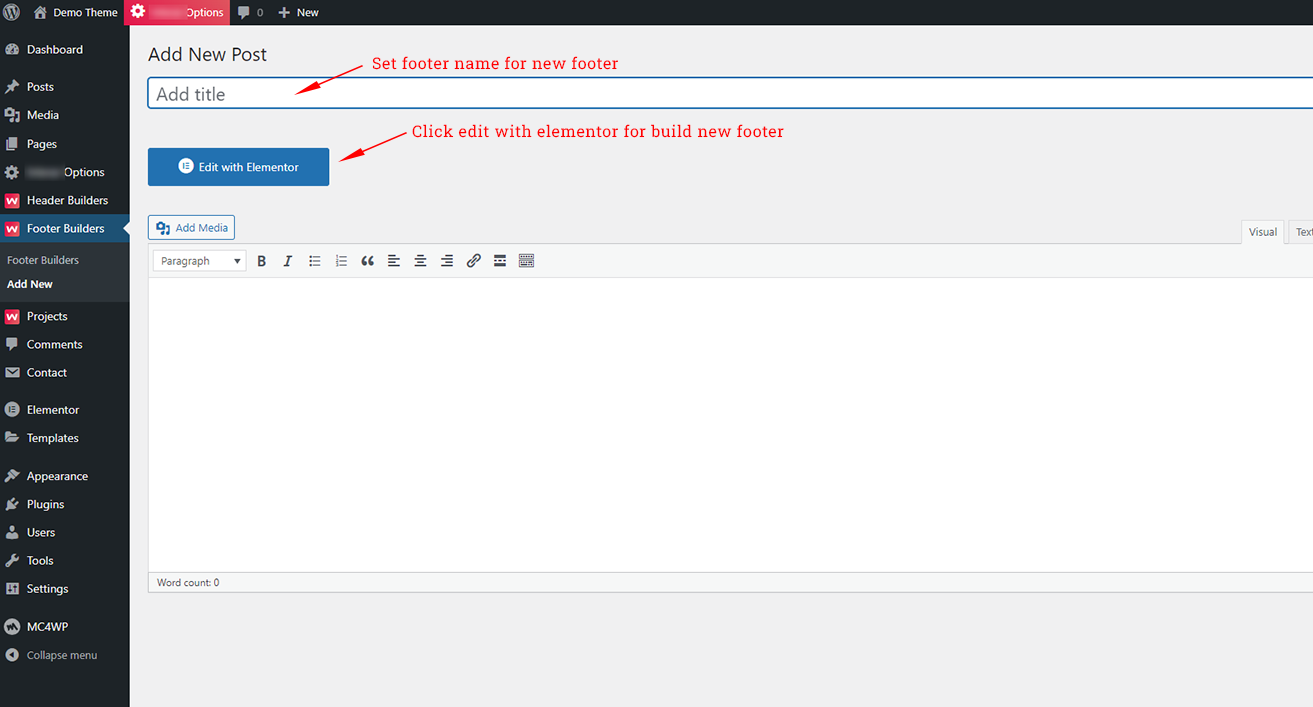
Footer Settings
To setup header navigate to Dashboard → Footer Builders
You can add new footer using elementor page builder from here
Theme Options Panel
Follow the screenshot to change your theme layout from Theme Options

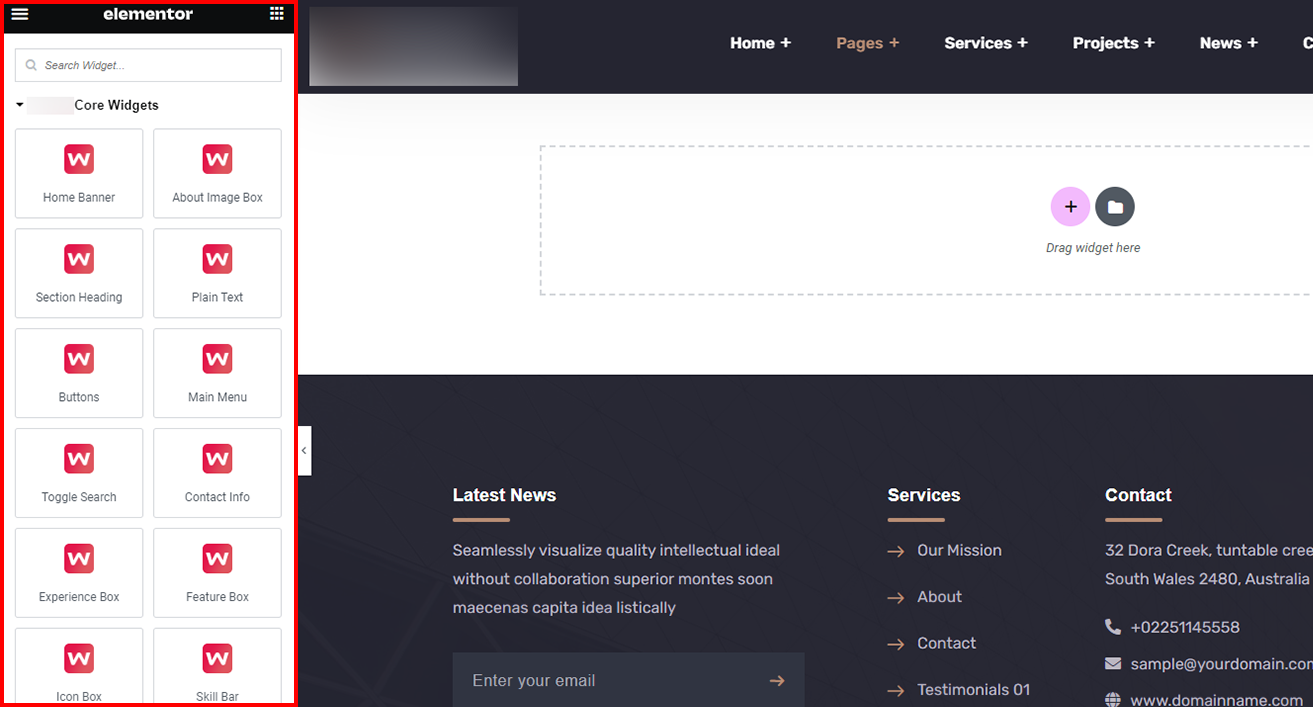
Elementor Widgets
You will find all Elementor Widget at Admin Dashboard Pages → any Page edit See screenshot below

Source & Credits
Images:
- Freepik - https://www.freepik.com/
Icons:
- Icons Font Face - https://icons.getbootstrap.com
- Icons Font Face - https://fontawesome.com/v5
Support
If this documentation doesn't answer your questions, So, Please send us via Email
Please give us 5 star ratings for grow our business
Thank you
Once again, thank you so much for purchasing this theme. As I said at the beginning, I'd be glad to help you if you have any questions relating to this theme. If you have a more general question relating to the themes on ThemeForest.